Showing posts with label 13th Foot. Show all posts

Friday, August 19, 2011

St. Kitts (8): Watching and Waiting

This is the seventh in a series of post on the St. Kitts campaign of 1782. The St. Kitts campaign took place in what is known as the West Indies theater of the Revolutionary War. [Click for Part 1, Part 2, Part 3, Part 4, Part 5, Part 6, or Part 7].

De Bouillé’s March

On January 28th, 1782. The British (under Brigadier-General Robert Prescott) landed troops from the 13th, 28th, and 69th regiments on St. Kitts and fought a French detachment commanded by Comte de Fléchin (Part 7). Although de Fléchin occupied a commanding height, his men were greatly outnumbered, and forced to retreat after an hour or so of heavy fighting. This withdrawal gave the British a clear road into the island’s interior. The Marquis de Bouillé quickly moved to block this opening. According to de Bouillé:

I was told around 4:30pm of the enemy landing and of M. de Flechin’s battle. I departed instantly, after issuing orders… I took 4 pieces of 8 [i.e., four 8-pounders], and I made my march during the night with around 3,000 men.

I was ignorant about the enemy’s force… I deployed my troops in two columns, with one taking the road by the sea, led by M. de Saint-Simon; the other, which I led, by the great road.

I arrived around 9pm at Basse-Terre, where I found in the rear of the town M. de Flechin with his detachment. [1]

At Basseterre, de Bouillé learned that he had more than enough men to defeat Prescott. His chief concern at this point was that the British might get around his left flank and into the mountains. There they might find some way of aiding the besieged garrison on Brimstone Hill. According to de Bouillé, “I had the hussars beat the passes, and I sent detachments to my left, with instructions to prevent an enemy movement to his right.”

When General Prescott discovered this new French force, he pulled back from the Mooring Hills to a more defensible post on St. Timothy’s Hill.

Not longer afterwards, de Bouillé began a pursuit. He wrote:

I made my march in one column. I crossed the field of battle where M. de Flechin had his combat. There I found a great number of wounded, of the English and of ours, which had been abandoned.

As daylight spread on the 29th, de Bouillé could see Prescott’s force on St. Timothy’s Hill. Just offshore were several British frigates. De Bouillé could not attack Prescott without exposing his troops to a devastating fire from front and flank. Even on the Mooring Hills his men were endangered. The British vessels saw “several parties of the enemies troops drawn up in different places” and the frigates opened fire, killing two men.

Soon, both sides withdrew. The British infantry re-embarked on the frigates, having failed to “distress, puzzle, and embarrass the enemy” as Hood had hoped. De Bouillé, with most of his men, returned to the siege of Brimstone Hill.

The Siege Unabated

Brimstone Hill once again became the locus of military operations.

On the night of the 29th, British boats attempted to get troops into Brimstone Hill fortress from a cove near Sandy Point. De Bouillé had 150 men and two cannon in this area, and they repulsed the attempt.

On the 30th, de Bouillé informed Shirley that the British relief force had received a check and reembarked. He asserted that the garrison’s situation was now hopeless and that they should surrender. Governor Shirley declined.

On the night of the 31st, French infantry found at the base of Brimstone Hill a large, abandoned cache of artillery. This included eight brass 24-pounders, with 6,000 cannonballs, and two brass 13-inch mortars, with 1,500 shells. These guns had been part of the “travelling artillery of the West Indies,” kept in storage on St. Kitts. As the artillery belonged neither to the garrison, nor to the militia, neither had thought to remove the guns and mortars to a more secure location when the invasion began. This windfall would allow the French to escalate their bombardment of the British garrison.

The British now looked forward to the arrival of a naval squadron commanded by Admiral George Brydges Rodney. Rodney had intended to set sail for the West Indies in December, but an unfavorable wind kept his fleet grounded until mid-January. When he did set sail, he encountered difficult weather. At the time that Prescott was abandoning his post on St. Kitts, Rodney was still 3 weeks away from the West Indies.

The key questions at this point were: how long could Brimstone Hill hold out against round-the-clock bombardment? How long could the French continue the siege? What would happen when the ships commanded by Rodney and Samuel Hood united?

Notes:

1. Attaque et prise de Saint-Christophe dit le «Gibraltar» des Antilles (janvier-février 1782), in Revue Historique des Armées, Vol. 1, 1974. This article includes extracts from «Mémoires Secrets» de Bouillé. (Translation of those extracts is my own).

Other information in this post is drawn from: David Hannay (1895). Letters written by Sir Samuel Hood (Viscount Hood) in 1781-2-3; Algernon Aspinall (1915). West Indian tales of old; Charles Middleton (1907). Letters and papers of Charles, Lord Barham, Volume 1; George Basil Mundy (1830). The life and correspondence of the late Admiral Lord Rodney, Volume 2; the Journal Politique for 1782; Journal of the capture and recovery of Nevis in Charles Ekins (1824). Naval battles, from 1744 to the peace in 1814.

Friday, July 29, 2011

St. Kitts (7): Battle on Land

This is the seventh in a series of post on the St. Kitts campaign of 1782. The St. Kitts campaign took place in what is known as the West Indies theater of the Revolutionary War. [Click for Part 1, Part 2, Part 3, Part 4, Part 5, or Part 6].

The Siege Continues

While the French and British fleets battled south of St. Kitts (Parts 5 and 6), the Marquis de Bouillé continued to attack Brimstone Hill, despite shortages of guns, mortars, and ammunition (cf. Parts 3 and 4). On the 25th, his men opened fire from a new 5-gun battery on Binkes’ Plantation, a little over 1,000 yards to the east, on high ground that was about level with Brimstone Hill. Enough guns and mortars were in action by now to begin inflicting significant damage to the fortress. According to British Governor Shirley:

the enemy [on the 25th] began an incessant fire upon the garrison with their mortars and cannon and continued it till midnight. This day [the 26th] the enemy's fire destroyed the building wherein our whole stock of rum was deposited, and a store which contained a considerable quantity of provisions and arms, and every building on the Hill except two small rooms. [1]

A new wrinkle for de Bouillé was the presence of British infantry with the fleet commanded by Rear Admiral Samuel Hood. To help protect his northern flank, de Bouillé ordered a battery to be erected that would command Fig Tree Bay, north of Sandy Point Town. To help protect his southern flank, de Bouillé placed a detachment at Basseterre.

The British Landing

The British regular army troops with Hood’s fleet included the 28th Regiment of Foot and the flank companies of the 13th Regiment of Foot. These men were commanded by Brigadier-General Robert Prescott and had been temporarily drawn from the garrison on Antigua. Hood also had the services of troops serving as marines for his fleet; these included the 69th Regiment of Foot and two battalions of His Majesty’s Marines.

According to a second-hand account by John Moore, Prescott presented Hood with a couple of options for relieving the British garrison on Brimstone Hill.

General Prescott offered to join and reinforce the garrison with 700 or 800 men if Lord Hood would land him near Charles Fort at the bottom of the hill [i.e., Brimstone Hill], or if he would give him a couple of frigates to land him at the back of the island. Such was his knowledge of the country that he expected to reach Brimstone Hill from thence by by-paths over the mountains, unknown to the French army. Both these proposals Lord Hood rejected, and proposed to the General to land at some distance from Basseterre, as he said, to make a diversion. [2]

Hood’s reasoning was stated in a letter to Prescott, dated January 27th. He wrote:

It appears to me of great importance to the king’s service to possess a post on shore, and I beg to submit it to your serious consideration. I can land two battalions of marines of 700 each, rank and file; the 69th Regiment of 500 rank and file, which, with the troops in the frigates [i.e., Prescott’s men from Antigua], including officers, would make a body of 2,400; and you might have as many guns, 12- and 9-pounders, as you please. It would certainly, I should imagine, make a diversion in favour of Brimstone Hill, and very much distress, puzzle, and embarrass the enemy. [3]

Hood appears to have believed that this force would be too small to raise the siege, but too large for the French to ignore. He saw little risk in this enterprise, he told Prescott, “because your retreat can always be secure.” In other words, Prescott’s men would be defended by the guns of the Royal Navy.

According to Moore, “General Prescott endeavoured to show the absurdity of this.” It seems Prescott felt that Hood’s plan was overly cautious and only a bold move would save the island. However, “His Lordship, as usual, was deaf to reason, adhered to his opinion, and told the General that if he did not choose to land the troops he would land the marines.”

This last part is undoubtedly true; Hood concluded his letter of the 27th by stating that if Prescott did not this plan, “I shall be inclined to land a party of marines to rout the French from Basseterre, [and] hoist the English flag.”

Prescott could not get to shore without the cooperation of the Royal Navy. Therefore, he reluctantly agreed to follow Hood’s proposal.

The troops from the 13th, 28th, and 69th regiments disembarked on the morning of the 28th, and landed on the shore of Frigate Bay. The marines remained with the fleet. According to Captain William Cornwallis of the Canada, the day was marked by fresh breezes and cloudy weather.” [4]

The British Landing (click to enlarge). This map shows the site of the clash on January 28th, 1782 between Prescott and de Fléchin. Also shown is the approximate position of Hood's fleet and de Bouillé's army.

French Forces at Basseterre

The detachment of French troops defending Basseterre was commanded by Le comte de Fléchin, a senior officer in Regiment Touraine [5]. This detachment consisted of the grenadiers and chasseurs from regiments Agénois and Touraine, a portion of Regiment Dillon, and the Volontaires de Bouillé. [6]

Among those stationed near Basseterre was Chevalier de Montlezun, a sous-lieutenant of chasseurs. [7] De Montlezun, still in his teenage years, would later recall tiring days beneath a burning sun and sleepless nights watching for a British attack. His platoon, it seems, dieted chiefly on the fruit of prickly pear plants. These plants abounded on the hills south and east of Basseterre, and one walking across these hills would be tormented by their sharp spines. Nevertheless, according to de Montlezun, the landscape was enchanting. Looking around, he saw green fields of sugarcane surrounded by steep and wild hills, a pale blue salt pond, rows of coconut trees, and a narrow and hilly peninsula, with the ocean lapping on either shore. [8]

It was on this spot that the principal land combat would occur during the St. Kitts campaign and where de Montlezun would have the fight of a lifetime.

When the British infantry landed, de Fléchin moved to confront the British, despite being greatly outnumbered. De Fléchin felt it his duty to delay the British so that de Bouillé would have time to organize a proper defense of the island. De Fléchin left the grenadier company from regiment Touraine and half of his troops from Regiment Dillon to defend Basseterre. The rest were thrown onto the Mooring Hills, southeast of town. From this commanding height they prevented Prescott from moving inland.

Basseterre, Frigate Bay, and the Mooring Hills (click to enlarge). Basseterre town is at left. Frigate Bay is at center (note the three anchors). The Mooring Hills are just to the left of Frigate Bay, and above Great Potatoe Bay.

The French deployment on the Mooring Hills appears to have been as follows: On the right (closest to the sea) was a detachment of 50 men from Regiment Dillon and the 60-man Volontaires de Bouillé, in the center were the flank companies of regiment Agénois, and one platoon of chasseurs from Regiment Touraine, and on the left was the remainder of the Touraine chasseurs (including de Montlezun). The total force numbered around 300 or so men. [9]

The Battle

The three British regiments assembled in column formation on the beach. Around 1pm, General Prescott ordered the 28th and 69th regiments to occupy the Mooring Hills. According to an eyewitness on Nevis, the British regulars “performed this service with gallantry, though their march was all up hill, and through thick shrubs and prickly pears.” [10]

At the same time that the British infantry were ascending the Mooring Hills from the south, de Fléchin was leading a party of men up the northern slope. As the leading British soldiers neared the summit, they unexpectedly “ran against a detachment of… grenadiers and chasseurs running up at full speed” from the opposite direction. The battle had begun. [11]

The British Infantry Land on St. Kitts. From a 1782 painting by François Lescalet. Several frigates are shown disembarking men along the shore. The British form on the beach and advance into combat with de Fléchin's men on the hill at right.

Close up view of British infantry forming on the beach.

De Montlezun and his men were on the British side of the hills when the fighting began. A few British troops were spotted at a dwelling, and de Montlezun was ordered to attack these with his platoon. However, as the chasseurs rushed forward, more and more British troops came into sight, and drew up in a formidable line of battle in an alley of palm trees. De Montlezun’s men would have been slaughtered were it not for the fact that some of the chasseurs on higher ground could see the danger and called for them to come back.

Close up view of chasseurs from Regiment de Touraine. Possibly these men are intended to depict part of de Montlezun’s platoon.

The movement of two British columns up the hill unmasked de Montlezun’s position, and he and his chasseurs began to be shelled by British frigates (they had four in action).

De Montlezun and his men then joined the scramble for control of the hills, where “The musketry fire began at a distance of 10 paces.” He recalled, “Arriving on the line, through a shower of bullets, I had the misfortune to see fall… the valiant Villebrune, second captain of the Agénois chasseurs [12]. The whiteness of his uniform was replaced by a tinge of blood that covered him entirely.”

Close up showing Comte de Flechin rallying the French infantry.

According to the biographer of Chevalier de Mirabeau, then a staff officer in Regiment Touraine, “There were on both sides desperate efforts, furious and repeated counter-attacks… Many times, the French overwhelmed by the number of assailants and shot down by the frigates in the bay, seemed about to succumb,” but the infantry, exhorted by their officers, grimly hung on. De Mirabeau “stood out among those most careless of danger,” until finally “His horse was killed, [and] he was shot in the thigh.” [11]

De Montlezun remembered that “The battle dragged on relentlessly. A mulatto, my company drummer, had the courage to beat the charge for the whole hour that the combat lasted.” De Montlezun admired “the imperturbable coolness” of this drummer, “surrounded by blood and carnage”, who could “expect no reward for his dedication.”

Finally, General Prescott ordered his reserve (the grenadier and light infantry companies of the 13th Foot) to sweep around the French left flank.

“At last,” according de Montlezun, “the ammunition was totally exhausted and,” he wrote with considerable exaggeration, “half of the officers and men had died.” Those still on their feet could not contest the advance of the British reserve, which “was in motion to turn our flank and place us between two fires.”

De Fléchin, realizing that the situation had become hopeless, ordered a retreat. The British had won a strong post near shore, and an open road into the interior.

French losses were about 86 men killed or badly wounded (about ¼ of those engaged). These losses were heaviest in the grenadier and chasseur companies of Regiment d’Agénois. [13]

De Fléchin, although defeated, was lionized for having put up such a stiff fight against the British forces.

British losses were approximately 17 killed, 47 wounded, and 7 missing (71 in total). The 69th Foot reportedly lost 5 officers and 29 men killed and wounded; this loss in officers was one of the highest by a British regiment during the war. [14]

Admiral Hood singled out for praise Lieutenant-Colonel (and New York land baron) Philip Skene, who led the 69th in this engagement. [4]

Notes:

In October of last year, I made a preliminary assessment of this combat and concluded that the fighting probably took place on St. Timothy's Hill. Further research has led me to conclude that the action almost certainly took place on "the Mooring Hills" instead. None of the sources is explicit on this point, but it is the logical conclusion in view of several pieces of evidence. Most important to my way of thinking was a statement by the anonymous journalist on Nevis, who wrote "This day 700 regulars, being all the effectives General Prescott brought down with him, were landed under cover of the frigates at Frigate and Potatoe Bays [both locations are shown on the map above]. The French had a body of men posted on the hills above them..." Further, his description of events following the battle (these will be covered in the next post in this series) makes clear that the battlefield was closer to Basseterre town than St. Timothy's Hill. See Note #10, below, for the full account.

1. Excerpts from Shirley’s journal are from Algernon Aspinall (1915). West Indian tales of old.

2. The diary of Sir John Moore, Volume 1.

3. Charles Middleton (1907). Letters and papers of Charles, Lord Barham, Volume 1.

4. David Hannay (1895). Letters written by Sir Samuel Hood (Viscount Hood) in 1781-2-3.

5. Full name: Charles-François-Joseph de Fléchin de Vamin

6. Attaque et prise de Saint-Christophe dit le «Gibraltar» des Antilles (janvier-février 1782), in Revue Historique des Armées, Vol. 1, 1974. This article includes extracts from «Mémoires Secrets» de Bouillé.

7. Full name: Barthélemi-Sernin du Moulin de Montlezun de la Barthelle

8. Baron de Montlezun (1818). Souvenirs des Antilles. Translations of this work are my own.

9. De Montlezun described himself as being on the extreme left and he reported seeing only white-coated troops from regiment Agénois and Touraine to his right. This leads me to believe that the troops from Dillon and the Volontaires de Bouillé were even further to the right (outside his field of vision), and nearest the British fleet. Admiral Hood was under the impression that the British were fighting Irish troops in French service [cf. Note #4]; however, the detachment from Regiment Dillon was the only set of Irish troops in de Fléchin’s command. The total of “300 or so” is an estimate based on inconsistent statements about de Fléchin’s numbers across several sources.

10. Journal of the capture and recovery of Nevis in Charles Ekins (1824). Naval battles, from 1744 to the peace in 1814.

11. Eugéne Berger (1904). Le vicomte de Mirabeau (Mirabeau-Tonneau) 1754-1792. Translations of this work are my own.

12. Full name: Servant-Paul le Saige de Villebrune

13. Statements about French losses varied slightly from source to source. cf. Note #6, above, the Journal Politique of April, 1782 (seconde quinzaine), and other French accounts of the campaign.

14. See Note #10, above, and the Remembrancer for 1782.

Saturday, July 9, 2011

Uniforms of the St. Kitts Campaign

I'm about halfway through a series of posts on the St. Kitts campaign of 1782 (the most recent post was Part 5). Upcoming posts will focus on a naval engagement on January 26, a land battle on January 28, and the final days of the siege of Brimstone Hill.

As an aside to this series, I discuss in this post the uniforms worn by British and French army regulars during the campaign.

The description that follows touches on only some aspects of the clothing worn by these troops. For a much more complete account, see Philip R. N. Katcher (1973). Encyclopedia of British, Provincial, and German Army Units 1775-1783, and René Chartrand (1991). The French army in the American War of Independence.

British Army

British regulars wore red coats. Individual regiments were distinguished by the color of the coat "facings" (i.e., collar, cuffs, and lapes), by the lace pattern worn around the buttonholes (white with different combinations of colored stripes), and by the metallic color used for officers’ buttons, hat trim, etc. (A copy of the uniform regulations can be found here).

  • 1st (or Royal) Regiment of Foot: Blue facings. Lace pattern was one blue "worm". Officers’ metal was silver.
  • 13th Regiment of Foot: Yellow ochre facings. Lace was worn in pairs; pattern was one yellow stripe. Officers’ metal was silver.
  • 15th Regiment of Foot: Yellow ochre facings. Lace pattern was one mixed yellow and black stripe and one red stripe. Officers’ metal was silver.
  • 28th Regiment of Foot: Bright yellow facings. Lace pattern was one yellow and two black stripes. Officers’ metal was silver.
  • 69th Regiment of Foot: Dull dark green facings. Lace pattern was one red stripe between two green stripes. Officers’ metal was gold.

Perhaps the feature of British army uniforms that is least well understood is the caps and hats worn by the light infantry companies, which were not standardized, and which changed over time. At right is a private of the "picket company" of the 13th Foot, wearing an early version of a light infantryman's cap. The uniform predates the Revolutionary War (by which time picket companies had been replaced by light infantry companies).

British Light Infantry Officer. This officer, thought to have been with the 15th Foot, is wearing a round hat cocked up on the left side and adorned with a feather. This style of hat would have been worn by the light infantry companies of the 15th and 28th regiments during the Philadelphia campaign of 1777, and possibly retained by these regiments after they were sent to the West Indies in 1778. The light infantry company of the 15th Regiment helped garrison Brimstone Hill fortress.

British Light Infantry on Maneuvers. This section of a painting by Philippe Jacques de Loutherbourg shows what may be the light infantry company of the 69th Foot participating in war game exercises in England, circa 1778. The dark green facings and the style of leather cap match known uniform details for this unit.

French Army

Most regiments of the French regular army wore white coats. Individual regiments were distinguished by the combination of facing color on cuffs and lapels, the orientation of the side pocket flaps, and the color of the buttons.

  • Régiment d'Armagnac (6e): Light blue lapels, vertical pocket flaps, white buttons.
  • Régiment de Champagne (7e): Light blue cuffs, vertical pocket flaps, white buttons.
  • Régiment d'Auxerrois (12e): Black lapels, vertical pocket flaps, white buttons.
  • Régiment d'Agénois (16e): Violet cuffs, horizontal pocket flaps, yellow buttons.
  • Régiment de Touraine (34e): Pink cuffs, vertical pocket flaps, white buttons.
  • Régiment d'Hainault (51e): Crimson cuffs, vertical pocket flaps, white buttons.
  • Régiment Royal Comtois (76e): Blue cuffs, vertical pocket flaps, white buttons.
  • Régiment de Dillon (90e): Red coats, yellow cuffs and lapels, horizontal pocket flaps, yellow buttons set in herringbone fashion. At right is a 1779 illustration of a chasseur of this regiment.

Several units of French colonial troops also participated in the St. Kitts campaign. Régiment de la Martinique wore blue coats without lapels and with buff cuffs and collars. Régiment de la Guadeloupe were dressed similarly, but had crimson cuffs and collars. The Volontaires de Bouillé wore a distinctive "blue short coat" with "red cuffs," and a "helmet" (per Chartrand, 1992). Hussars of the 1st Legion of the Volontaires étrangers de la Marine were also present. These wore a uniform similar to that of the well-known Lauzun's Legion.

Regulation uniforms for grenadiers of regiments Hainault (left) and Touraine (right). Note the facing color is used to line the collar and lapels. The red epaulets and hat tuft identify these men as grenadiers.

Both British and French army units may have modified their clothing in various ways. One well-known example of this in the French case is that some (and possibly many) grenadier companies wore bearskin caps rather than the proscribed cocked hats.

Grenadiers of Régiment de Soissonnois in 1781.

A series of images by Nicolas Ponce suggests that chasseur companies also deviated from the regulated headgear. In these images, the chasseurs are shown wearing a round hat that is cocked in the back and adorned with a feather. This style seems practical; unfortunately, I have not come across any evidence to date that corroborates the accuracy of this depiction.

Chasseurs of Régiment de Dillon at the capture of St. Eustatius in 1781.

Wednesday, June 29, 2011

St. Kitts (5): The Fleets Clash

This is the fifth in a series of post on the St. Kitts campaign of 1782. The St. Kitts campaign took place in what is known as the West Indies theater of the Revolutionary War. [Click for Part 1, Part 2, Part 3, or Part 4].

Hood’s Mission

Rear Admiral Samuel Hood learned on January 14th that the French were attacking St. Kitts. He and his fleet promptly left Barbados and sailed north for Antigua. En route he was joined by the Russell, which increased his fleet to 21 ships of the line. Hood noted that he had “nothing but flattering winds” on this voyage, but his ships faced “an ugly sea at times” and two ships lost a maintopsail yard and another additionally lost a main topmast and mizzen topmast. [1]

----------------------------------------------------

Hood’s Mission: January 14-24, 1782 (click to enlarge). This map shows Hood’s route from Barbados to Nevis January 14-24 (red line). Also shown is the path taken by the French fleet under de Grasse from Martinique to St. Kitts (January 5-11; blue line). Both paths are approximate.

----------------------------------------------------

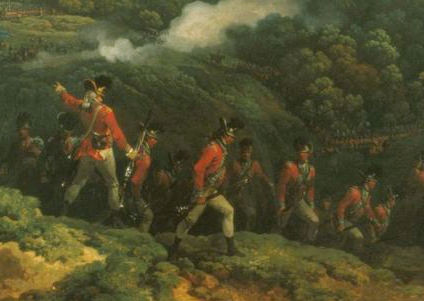
On the 21st, Hood reached Antigua, where he was joined by the Prudent and a couple of lesser vessels. The British fleet then began to take on board provisions and part of the island’s garrison. The troops from the garrison included Brigadier-General Robert Prescott, the 28th Regiment of Foot, and the flank companies of the 13th Regiment of Foot. [2]

By the evening of the 23rd, preparations were complete, and the British fleet sailed out of St. John’s Harbour on Antigua, and anchored at sea. The French and British fleets were now about 60 miles apart.

Hood had probably learned that the French fleet at St. Kitts was, as one eye-witness put it, “formed [in] no regular line,” but rather were “in great confusion in Basseterre road, three or four deep.”

Hood’s intention, it seems, was to cross from Antigua to St. Kitts during the night, and to strike the French in Basseterre roadstead at daybreak. There, with the wind at his back, he would strike the eastern end of the French fleet. The rest of the French fleet would have difficulty coming to their assistance (they would be working against the wind). In this manner, he hoped to win a major victory before the French were ready for battle.

----------------------------------------------------

Rear Admiral Samuel Hood

----------------------------------------------------

The British sailed that night with 22 ships of the line in the following order of battle: [3]

Advance Guard (Francis Drake)

Alfred (74 guns), Alcide (74), Intrepid (64), Torbay (74), Princessa (74), Prince George (98), Ajax (74)

Center (Samuel Hood)

Prince William (64), Shrewsbury (74), Invincible (74), Barfleur (98), Monarch (74), Belliqueux (64), Centaur (74), St. Albans (64)

Rear Guard (Edmund Affleck)

Russell (74), Resolution (74), Bedford (74), Canada (74), Prudent (64), Montagu (74), America (64)

De Grasse’s Defense

The French had been expecting the British fleet for some days. The French commander, François-Joseph-Paul de Grasse, concentrated his fleet in Basseterre roadstead and used frigates and other, smaller vessels, as lookouts. The lookouts quickly spotted Hood’s departure from Antigua on the evening of the 23rd.

De Grasse then had to decide how he would face the British fleet. One option was to form a line of battle in Basseterre roadstead. As he had numerical superiority and occupied an excellent harbor, he should have been able to ward off any attempt to oust him. However, he thought this might not be the best position if Hood was determined to aid the British garrison on Brimstone Hill. Instead, it might be better to take to the open sea southwest of Basseterre. There, he would be windward of Hood’s ships and poised to maul the British while they lay close to shore. A third consideration was that he was expecting the arrival of supply ships and other reinforcements. If he remained at Basseterre he would be placing these vessels at grave risk of capture.

On balance, de Grasse decided it would be best to take to the open sea and await the British fleet. He planned to set sail the following day.

Hood Reaches St. Kitts

Hood’s daring plan to strike the French fleet in Basseterre roadstead was foiled before it could put into effect. The early morning hours of January 24th were “squally with rain” and by daylight the British fleet was near the south end of Nevis, but still far short of its destination. Also, one of Hood’s leading ship of the line (Alfred) had collided with one of his frigates (Nymphe) with the result that Alfred’s “fore topmast [was] down, and jib boom and sprit-sailyard gone,” and it appeared “much damaged about the bows…” Alfred was in no shape for immediate action, but, it was determined, the necessary repairs could be made in less than 24 hours. Having lost the advantage of surprise, Hood advanced cautiously towards St. Kitts.

The two advance-most British frigates (Lizard and Convert) in Hood’s fleet reached the western shore of Nevis far ahead of the ships of the line. A large French cutter (l’Espion), then just arriving from Martinique, mistook the British frigates for French ones and was promptly captured. The cutter was bringing to St. Kitts mortar shells and other ordinance, which the French could ill afford to lose.

That afternoon, the French fleet began to get underway, and headed south. At 10:00pm, Hood could see from the deck of his command ship (Barfleur) “20 strange vessels in the N.W., which proved to be the French fleet.” Neither commander sought battle at this late hour. Instead, the British sailed south, to a point near Isle Redondo, while the French drew closer to St. Kitts.

The Fleets Clash

The two fleets maneuvered during the night of January 24th-25th. Cannon discharges and rockets were used (at least among the French) to transmit signals in the darkness. Hood, by this time, had formed a new plan -- to take anchorage in Frigate Bay, a short distance southeast of Basseterre. Hood later called this “the only chance I had of saving the island, if it was to be saved.”

Specifically, Hood intended to gain a defensive position that would neutralize the French advantage in numbers. Ships at anchor could be carefully arranged into a defensive line that would be difficult to attack. Also, ships at anchor were relatively still and could fire with greater accuracy than those rolling on the open water.

Although Hood occupied the windward position (meaning that the winds favored his movements), a lunge towards Basseterre carried with it considerable risk. He would be placing his vessels between the French fleet and the rocky shores of St. Kitts and Nevis. Hood acted carefully before committing himself to this course of action. He later noted, “At daylight we plainly discerned thirty-three sail of the enemy’s ships… I made every appearance of an attack, which drew the Count de Grasse a little from the shore.” Close to midday, the situation appeared favorable to Hood – the main part of the French fleet was some 4 or 5 miles to the west and it appeared that the planned dash would be successful. Hood therefore ordered his fleet to sail north, hugging the coastline of the islands.

De Grasse had decided to concentrate on keeping his line of communications open and protecting the siege of Brimstone Hill. Not unaware that the Basseterre anchorage had been left vulnerable, he ordered François-Aymar, Baron de Monteil, “to hug the point of Isle Nevis” with the French “light squadron” (Caton, Hector, Sagittaire, and Experiment). As the British neared Nevis, de Grasse ordered the “light squadron and van… to bear down on the enemy’s [van].” The rest of the fleet followed “in a bow and quarter line.”

The French main body sailed in approximately the following order (note that the French were doubling back towards Nevis and consequently were in reverse order). [4]

Rear Guard (Louis-Antoine, Comte de Bougainville)

Pluton (74 guns), Bourgogne (74), Auguste (80), Neptune (74), Ardent (64), Scipion (74), Citoyen (74), Réfléchi (64), Glorieux (74)

Center (François-Joseph-Paul, Comte de Grasse)

Diadème (74), Northumberland (74), César (74), Ville de Paris (104), Sceptre (74), Saint-Esprit (80), Eveillé (64), Zélé (74)

Advance Guard (Jacques-Melchior, Comte de Barras)

Magnanime (74), Palmier (74), Jason (64), Marseillais (74), Duc de Bourgogne (80), Languedoc (80), Hercule (74), Souverain (74)

Contrary to de Grasse’s wishes, the light squadron did not contest the British advance. According to an officer with the French fleet,

…the French light squadron instead of continuing to bear down on the enemy, bore away. The admiral [de Grasse] surprised at this manoeuvre, thought that Nevis intercepted their wind [i.e., he thought that the mountainous island might have created a windless calm off its western shore]; to assure himself of it, [de Grasse] signaled [de Monteil] to lie to, which the squadron did; assured by this that it was by no fault of wind that they bore away, the admiral repeated his first signal to the squadron and the van; but it was too late... [5]

----------------------------------------------------

Hood’s Dash to St. Kitts (click to enlarge). Hood’s fleet passes the western end of Nevis en route to an anchorage off St. Kitts. De Grasse attempts to intercept Hood, while the light squadron, under de Monteil, bears away. Positioning of the British and French vessels is approximate. Ships carrying fewer than 50 guns are not shown.

----------------------------------------------------

The French then aimed at overtaking the center and rear of the British line (the British van was by now beyond their reach). However, the British vessels were moving too quickly and only the British rear found itself in real danger.

An eyewitness on Nevis described the engagement that followed:

About half-past two the Ville de Paris [de Grasse’s flagship]… fired about three single shots, probably to try the range of his guns; which were taken no notice of.

At about three o’clock the French Admiral began in earnest, seeming to direct his fire at the sixth ship from our rear [i.e., the Resolution]. He was immediately followed by about thirteen or fourteen of his ships nearest to him a-head and a-stern. This being returned by the six or seven or our rear, a most dreadful cannonade ensued, which spread by degrees to about the twelfth ship from our rear [i.e., Hood’s flagship, the Barfleur]. But the heaviest of the French fire fell on our last ships; for whose fate we trembled, as they had the fire of twelve or fourteen of the enemy on them at once; yet they never moved an inch out of line, but kept their stations and distances as steadily as if they had been at anchor; at the same time we could distinctly perceive they shot a-head of the enemy. [6]

At one point, de Grasse, aboard his flagship Ville de Paris, came close to cutting off the last three vessels in the British line (Prudent, Montagu, and America). According to Hood, “The Prudent had the misfortune to have her wheel shot to pieces [by] the first broadside”. Soon a gap began to develop between the Prudent and the vessel ahead (Canada), which the Ville de Paris attempted to exploit. However, Canada, followed by the vessels still further ahead (Resolution and Bedford) astutely slowed down and closed the gap.

The British Anchor

As the British vessels neared St. Kitts, they turned and anchored in line of battle in Frigate Bay. From this anchorage, some of the British vessels opened fire again as the French ships passed.

----------------------------------------------------

Hood Anchors (click to enlarge). Hood’s lead vessel (St. Albans) turns towards shore and anchors off of Green Point, on the southwest corner of St. Kitts. The following vessels anchor behind St. Albans, forming a line of battle. Meanwhile, the rear of the British fleet is engaged with the Ville de Paris and other French vessels. Some of the French ships, perhaps de Barras’ vessels, did not participate in this portion of the engagement. Positioning of the British and French vessels is approximate. Only ships of the line are shown.

----------------------------------------------------

A French officer, Chevalier de Goussencourt, glumly noted, “In spite of our fire, the English admiral managed his fleet so well that it anchored in our place with a spring on the cable, under our fire, without Mr. de Grasse preventing them” [5]. The French fleet turned and headed south for open waters. The last shots were fired around 5:30pm.

Only one British vessel was lost in this action, the frigate Solebay, which ran aground off Nevis at the beginning of the engagement. The observer on Nevis recorded that

Several French ships kept firing on her in this distress, and the Captain returned it; but, finding she must inevitably fall into the enemy’s hands, Captain Everett set fire to her and quitted her. She burnt for an hour or more, and blew up about eight o’clock with a most tremendous report; having 160 barrels of powder on board. [6]

The captain and his crew took shelter on Nevis.

----------------------------------------------------

Notes:

1. For primary accounts of Hood's actions during this period, see David Hannay (1895) Letters written by Sir Samuel Hood (Viscount Hood) in 1781-2-3 and Charles Middleton (1907) Letters and papers of Charles, Lord Barham.

2. The 28th Foot saw significant action in the Thirteen Colonies earlier in the war, distinguishing itself in the storming of Chatterton’s Hill at the battle of White Plains (October 28th, 1776). The regiment was sent to the West Indies in the fall of 1778. There, the 28th had significant losses, chiefly from disease. The regiment’s strength was kept up my drafting into it the rank and file from other weak regiments (which were then sent home to recruit). The flank companies of the 13th Foot saw little or no combat prior to the St. Kitts campaign. Seven of the regiment’s battalion companies were captured in November, 1781, when the Marquis de Bouillé stormed St. Eustatius.

3. cf. William Laird Clowes et al. (1898). The royal navy: a history from the earliest times to the present, Volume 3. Isaac Schomberg (1802). Naval chronology...

4. cf. Odet-Julien Leboucher (1788). Histoire de la derniere guerre...

5. John Gilmary Shea (1864). The operations of the French fleet under the Count de Grasse in 1781-2 as described in two contemporary journals.

6. cf. Journal of the capture and recovery of Nevis in Charles Ekins (1824). Naval battles, from 1744 to the peace in 1814.

Thursday, October 28, 2010

Combat on Kitts

One of the most remarkable images of Revolutionary War combat is a naïve-art painting of a skirmish on the island of St. Kitts on January 28, 1782. This is a very rare instance of a combat painting by a Revolutionary War soldier, created during the war. The artist was one François Lescalet, who served on the French warship Le Sceptre. The painting shows French infantry defending a hill against disembarking British infantry.

Two sections of this painting are shown below. A zoomable version of the painting can be found here.

British troops disembark on the island of St. Kitts (click to enlarge). Possibly (see analysis below) the column at left is comprised of troops from the 13th Foot, while the column at right is comprised of troops from the 69th Foot.

Comte de Flechin leads the defense (click to enlarge). Comte Charles-François-Joseph de Flechin, on horseback, is either rallying his troops, or sending men into action. At left, smoke-enshrouded regulars skirmish with the enemy.

Overall, the painting shows chiefly land and sky. The figures are small and vague, and the heavy smoke obscures the action. Nevertheless, a number of features stand out.

British Troops

The British form on the beach directly into columns, and the new arrivals take their place at the end of the column. The columns are formed two abreast, either because of the narrowness of the roads or to facilitate quick deployment into line. Three columns are shown, which seemingly correspond with the three infantry units known to have participated in this action: the flank companies of the 13th foot, the battalion companies of the 28th foot, and the 69th regiment. The first two of these wore yellow facings, the third wore dull green facings. Drummers in yellow can be seen alongside the left two columns. The visible facing colors, numbers of drummers, and length of each column suggest that the troops are, from left to right, those of the 28th, the 13th, and the 69th regiments. However, Lescalet may have chosen yellow as the facing color simply because it was common in the British army, and he may have varied the column length for other reasons.

French Troops

Flechin’s command included the chasseurs and grenadiers of regiments Agénois and Touraine, among others. It is not possible to discern which men belong to which regiment as the figures have not been given facing colors. The French troops are shown meeting the British near the base of the hill, suggesting that Flechin intended to fight a delaying action, slowly giving way, while still retaining the high ground. The French troops are not shown deployed as a single line, but rather as a cluster of small parties. This deployment makes sense in view of the difficult terrain.

Location

The action appears to be taking place on St. Timothy’s Hill, which is in the southeastern quarter of St. Kitts, on the edge of Frigate Bay. A comparison with modern photographs suggests that Lescalet painted a location that he had visited and remembered.

Section of the Lescalet painting.

Google Maps screenshot with the Panoramio images feature enabled (the image has been cropped). The photo was taken from St. Timothy’s Hill, looking south, and shows much of the same terrain visible that is visible in the Lescalet painting.

Outcome

The outcome of this skirmish on St. Kitts is in dispute. Francophile and Anglophile writers have claimed this as a decisive victory for the French and British, respectively. Two examples appear below:

John William Fortescue in A History of the British Army, Vol. 3 (1902):

"... Prescott [the British infantry commander] and his troops were able to land on the 28th. He was at once attacked by the French, who, however, were repulsed without difficulty."

René Chartrand in American War of Independence Commanders (2003):

"... on January 28, 1782, the British landed a relief force. Flechin, with a party of 300 men, charged the head of the British column. The stunned British re-embarked. Brimstone Hill [i.e., the British garrison on St. Kitts] surrendered on February 12 and Nevis also capitulated largely because of Flechin's outstanding action."

The truth, as far as I’ve been able to discern, lies somewhere between these statements. The British drove de Flechin’s small force off the hill, but the aggressive defense prevented the British from achieving any strategic advantage. The campaign for St. Kitts has been the subject of some recent reading on my part, and possibly it will serve as the topic for a future series of posts.